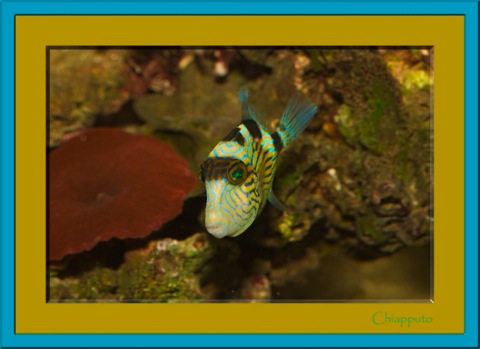
Photo 101
We are always excited to share the fun and excitement of photography with beginner photographers. Most amateur photographers are happy to simply take pictures in an automatic mode so they can focus on their subjects and not have to fiddle with all the special settings and modes available on their camera. Most modern digital cameras include a vast array of settings that provide creative control over the resulting photograph. These special settings open up an entirely new creative environment in which you can shape the photographs you take. Some settings control the ability to blur the background behind your subject while others allow you to control visual movement.
Below are three key terms related to photography. Better understanding of these terms will allow you to take better pictures.
In photography, Aperture controls the amount of light allowed to reach the film or sensor. This can be a bit tricky to understand, if you let it. The smaller the number (F1.4) the more light that is allowed to reach the sensor vs. a higher number (F22). A setting of F22 will let only a small amount of light reach the sensor. I guess all things are pretty relative when speaking in terms or more and less. The bottom line is that a smaller number = more light reaching the sensor. A larger number = less light reaching the sensor. I am certain that I could bore you with a more detailed answer of how and why, but this gives you the basics.
Images that are too Light or too Dark
Relativity aside, if you are shooting and continue to end up with images that are too dark for your taste, try a larger aperture (lower number). Of course you can always end up with the reverse situation as well. In that case, you need to reduce the amount of light reaching the sensor (higher number).
Now for the fun...
DOF
A wider aperture and a wide depth of field (Note: DOF is how much of your image is in focus or sharp) are basically opposites. For example, if I use wide aperture (F1.4), I will end up with a very tight DOF. If I need a wide DOF, I will need to make sure that I do not use a wide aperture (F1.4). An F22 will provide for a very wide DOF.
Bokeh
Let's throw out another term, "bokeh". Bokeh refers to the out of focus areas of an image which relates to a use of a shallow depth of field. If used properly, using a wide aperture can produce "Great Bokeh". Doesn't that just sound cool? Let's say it again, "Great Bokeh". Just because it sounds cool, does not necessarily mean that all Bokeh is good. An out of focus image, is simple that no matter how artistically you try to spin it. Bad Bokeh.
There is even software available which can help you add Good Bokeh to images with a wide DOF.
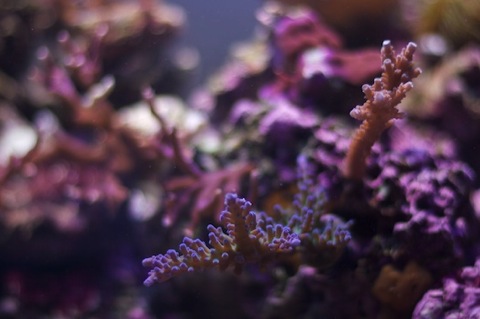
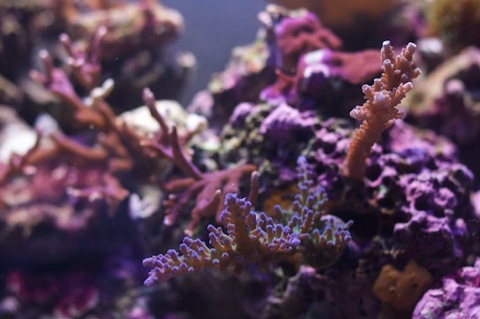
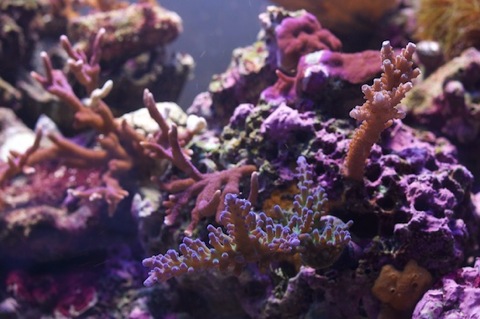
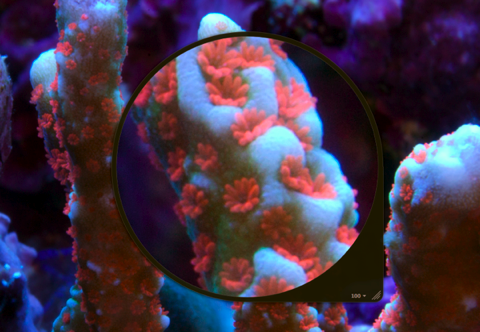
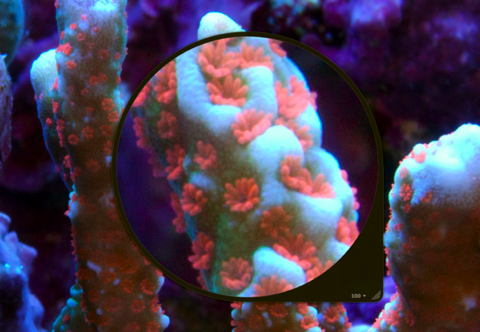
Changes to DOF
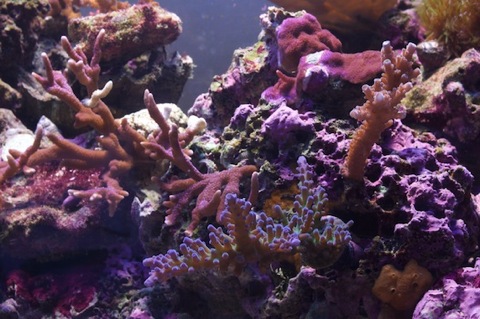
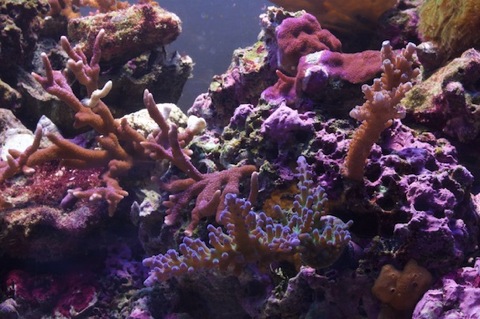
In the samples below you will be able to observe the changes to the DOF moving from an initial aperture setting of F1.4 all the way to a setting of F22. Notice what happens to the image along the way. The image taken at F1.4 has good bokeh. Also note the second piece of coral at the top right side which also occupies the same focal plane.
F1.4
F2.8
F5.6
F10

F16
F22
ISO when talking about photography, relates to a film's light sensitivity. Sometimes it is referred to as "film speed". A higher ISO is more sensitive to light.
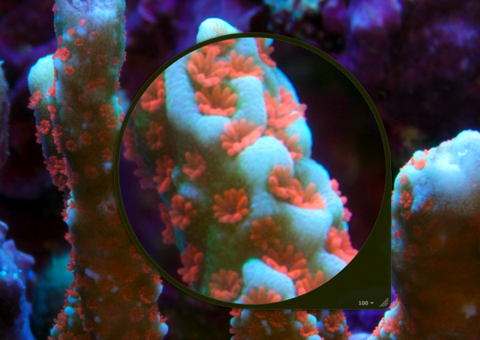
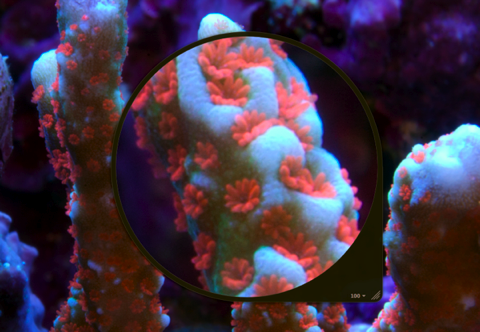
Below are several images taken with a Canon 10D 100mm Macro Lens of a piece of orange digitata coral. These images show the results of ISO ranging from 100 to 1600. All images were taken with an aperture of f/32 to provide the widest depth of field. Shutter speed varied in an effort to keep the image consistently presented. Note below that as the ISO increases, so does the noise (or grain) in the actual image. The noise really starts to pick up and appear very noticeable at ISO 800 and 1600. Different cameras perform better or worse when it comes to dealing with noise caused by higher ISO settings.
The bottom line is that sometimes if your are shooting with bad lighting (low lighting), increasing your ISO can provide relief. While an ISO of 100 will provide for the cleanest image (from an ISO stand point), an ISO of 200 or 400 can be just the solution you need to produce a properly lit image. Outside of shooting your aquarium, this can also be useful shooting in other indoor venues that do not have picture perfect lighting.
ISO 100
ISO 200
ISO 400
ISO 800
ISO 1600

Shutter Speed controls the amount of time that light reaches the film or image sensor. A faster (shorter) shutter speed allows light to reach the film or sensor for less time. A slower (longer) shutter speed allows light to reach the film or sensor for more time. This is about as basic an explanation as there is. Outside of shooting marine aquaria, shutter speed can and is used to achieve very dramatic results. We have all seen the images; running water caught frozen in time (fast exposure); the mystical mist like appearance of that same water flow caught with a slow exposure. The creative possibilities are seemingly endless!
F4 - 1/60 - ISO 400 - 100mm

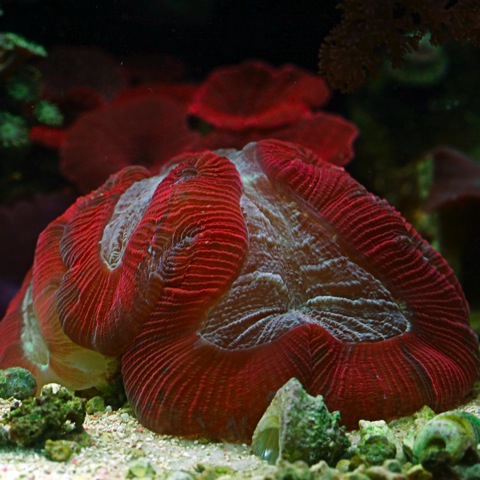
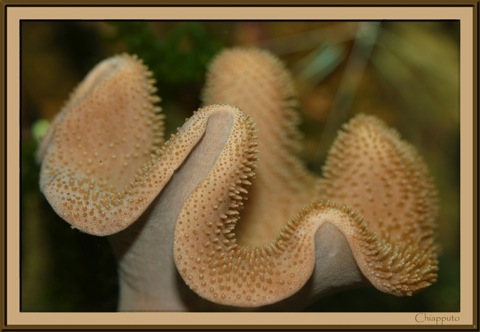
In marine aquaria we typically are trying to freeze time, especially in the endeavor of photographing our fish. Coral photography is a completely other discussion due to it being relatively stationary. We will touch on that in a bit. I don't know about you, but my fish do not typically pose for a snapshot. It would be oh so easy if the fish would simply sit still.

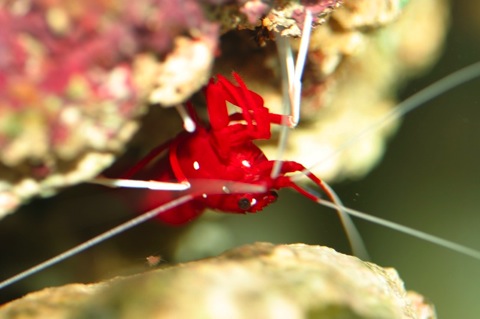
Capturing most fish with a camera requires a faster shutter speed (relatively speaking) to allow us to freeze time and space. Of course there are always those fish such as a Midas Blenny or Hawk fish which simply love to perch themselves on their favorite spot and sit perfectly still. These guys are mainly the exception. More often we are trying to photograph our Sailfin Tang, Royal Gramma, Gold Stripe Maroon Clown, etc. They rarely sit still. There is not a straight answer on the "correct" shutter speed to photograph a fish in motion. The faster the fish is moving, the faster your shutter speed will need to be in order to mitigate against motion blur. Hand in hand, the faster the shutter speed used may necessitate a wider aperture. From the previous presentation on ISO and Aperture, keep in mind that the all of these variables come together to help create a great image.
Hand-holding vs. using a Tripod
Hand-holding
When hand-holding for something like a still piece of coral or a fish, you will want to use a shutter speed that is at least as fast as your focal length (i.e. If you are using a 100 mm Macro lens, you would want to shoot with a shutter speed of at least 1/100 of a second). Can you shoot with a slower shutter speed and achieve great results? Certainly! A couple of tips you can try while hand-holding are:
1. Try bracing yourself against a wall or very stable object. This can help reduce camera movement while using a slower shutter speed.
2. As you line up the shot, hold your breath for a moment while you take the shot. This can help you to be as still as possible. This would definitely not be recommended for a 30 second exposure.
3. Got cash to burn? Buy a lens with built in image stabilization. Keep in mind that even an IS lens will not correct really bad camera shake. Even with the best equipment, it helps to have a steady hand.
F8 - 1/20 - ISO 100 - 100mm
Tripod
This is the by far best and in some opinions the only way to take longer exposures. To take the tripod approach a step further I would recommend using your camera's timer setting or to use a remote shutter release. This way you can eliminate the potential for camera shake caused by pressing the shutter release located on the camera body. For coral shots this is a best practice. A slower shutter speed combined with a wide depth of field will allow for a correctly exposed image unless of course you are trying to isolate your photographic subject.
F5.6 - 1/125 - ISO 100 - 100mm

F2.8 - 1/60 - ISO 100 - 100mm
F5.6 - 1/10 - ISO 100 - 100mm
F4 - 1/60 - ISO 100 - 100mm
F32 - 1/200 - ISO 100 - 100mm

F9.5 - 1/125 - ISO 100 - 100mm